Visualscope CMS Help Guide
- Overview
- Main Menu - Reviewing the main menu and its functions
- Making edits to pages
- How to add pictures
- How to add documents and pdfs
- How to add links
- What do the fields mean?
- Old Versions
Visualscope Content Management System (CMS) allows you to manage and update the content on your website. This CMS allows you to update text and information on your site along with upload images and electronic documents to your website.
Home
Welcome message.
![]()
Pages
This section has a listing of all the editable pages on your website. This is also where you go to edit content.
![]()
Library List
Listing of all objects from images to electronic documents uploaded to your website. This is also where you can add new images or electronic documents.
![]()
Settings
This is your default webmaster email where your online forms will go to.
![]()
Change Password
This is where you can change your CMS login administration password.
![]()
Log Out
Enables you to log out of the system when you are done. The system will also automatically log you out of the CMS if there is no activity within several minutes.
- To make an edit to a page located on your website go to the left menu and click on the option "Pages"
- You will then see a list of the different editable pages located on your website similar to the graphic below.
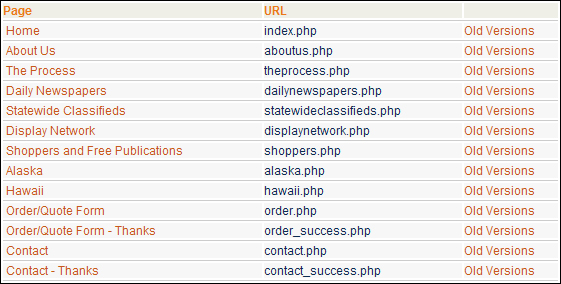
- To edit the page on your website click on the appropriate page on the left hand side.
- You will then be redirected to the page in edit mode. Your options will look similar to the graphic below.
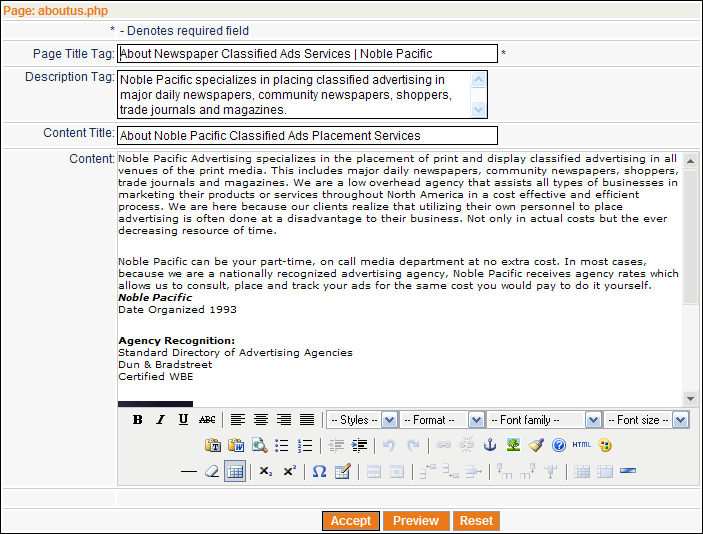
- Edit the text or images within the content box and press accept for your changes to go live.
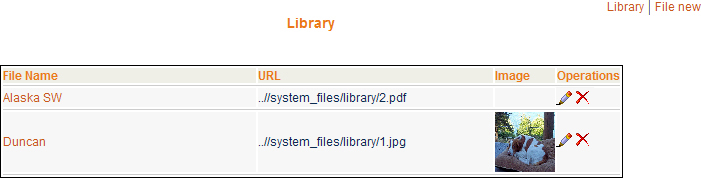
- Go to the left hand menu and click on the option "Library"
- You will then be redirected to a page will have a listing of all the items located in your library similar to the image below.
- On the upper right hand side click on the option "File new"
- You will then be redirected to a page that looks similar to the image below.

- In the field "Name" type in the name in which you want your file to be called. This will be the name in which you will use to locate your file when inserting the image into a page.
- Then click on the "Browse" button and search for the image on your computer system.
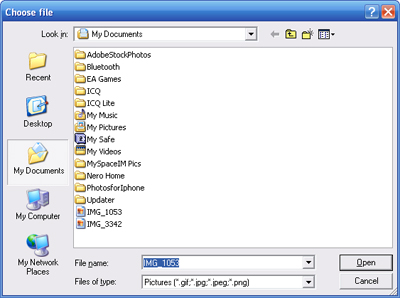
- Press the button "Open" to choose the image you selected.
- Once you have chosen an image, press the "Accept" button.

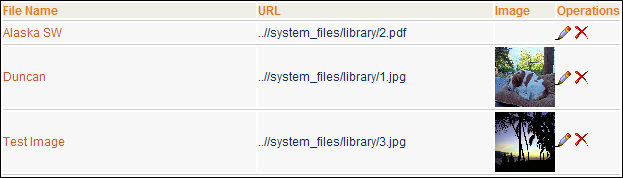
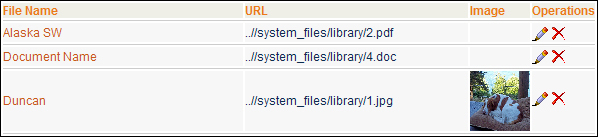
- The new Image should now show up in your Library items similar to the graphic below.
- Now you will need to go to the left hand menu and click on the option "Pages"
- You will see a list of editable pages on your website similar to the image below.
- Click on the page that you would like to add the image.
- You will then be redirected to the page's edit mode similar to the image below.
- Within the content box, go to the place where you would like your image to show up and click so that your cursor shows up in that area.
- Once you have place your cursor in the area where you want your image, click on the little tree icon just below the content box.

- A new window will then pop up similar to the image below.
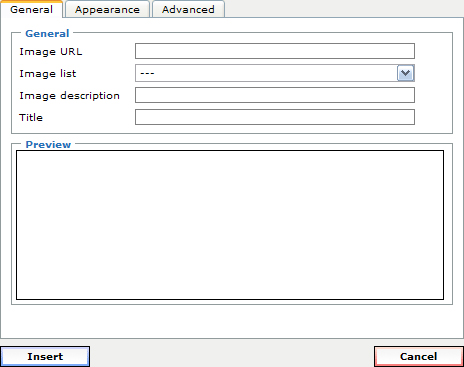
- You have 2 different options where you can get an image from.
- The "Image URL" option allows you to place the direct URL to an image located on a different website. The URL would be similar to "http://www.otherwebsite.com/image.jpg" .
- The "Image List" option allows you to choose an image located in your Library.
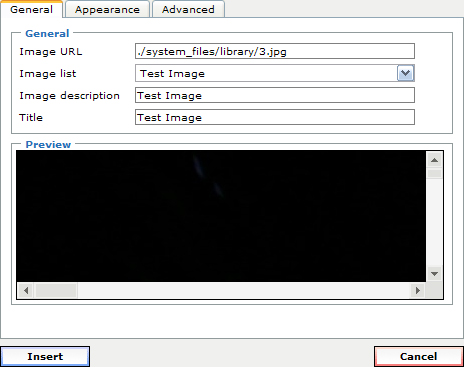
- If you have an image that you would like to use from your Library, click on the Image List option and choose the image that you would like to insert. Once you choose the image, the other fields in the box will automatically fill itself in.
- If you feel that the image is much to big for your website you can modify the appearance by clicking on the "Appearance" tab located on the top of the options box.
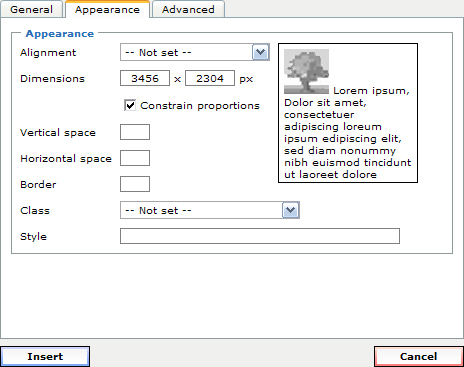
- Your options are as follows:
- Alignment - Use this option to align the image around the content area. If you want your text to wrap around the image, this option should be chosen in order to allow the wrap.
- Dimensions - This option allows you to modify the size of your image. Usually website's are built 800 pixels (px) wide so your image should most likely not exceed 600 pixels (px) wide. You can make these adjustments as needed. Keeping the constrain proportions checked will keep your image from becoming distorted as your make size adjustments.
- Vertical Space and Horizontal Space - This option allows you to put spacing around your image so that the text that wraps around it will not touch your image. For good spacing try putting "5" for Vertical and Horizontal Spacing.
- Border - this option will allow you to put a border around your image. If you are trying to get rid of a border that is around your image from being a link, set this value to "0".
- Once you have finished modifying your image, press the "Insert" button and your image will be placed within the content box. Press the "Accept" button to make your page live.
- Go to the left hand menu and click on the option "Library"
- You will then be redirected to a page will have a listing of all the items located in your library similar to the image below.
- On the upper right hand side click on the option "File new"
- You will then be redirected to a page that looks similar to the image below.
- In the field "Name" type in the name in which you want your file to be called. This will be the name in which you will use to locate your file when inserting the document into a page.
- Then click on the "Browse" button and search for the document on your computer system.
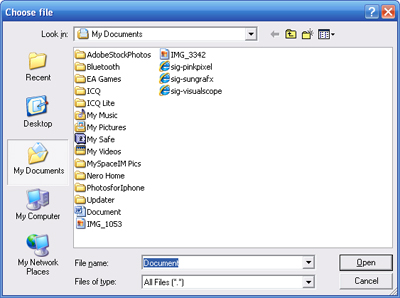
- Press the button "Open" to choose the document you selected.

- Once you have chosen an document, press the "Accept" button.
- The new Document should now show up in your Library items similar to the graphic below.
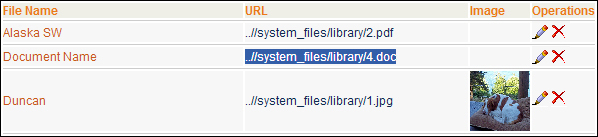
- Next you will need to highlight the URL of the document with your cursor and press "Ctrl-C" on your keyboard. This will copy the url to your clipboard so you can insert it correctly on your page.
- Now you will need to go to the left hand menu and click on the option "Pages"
- You will see a list of editable pages on your website similar to the image below.
- Click on the page that you would like to add the image.
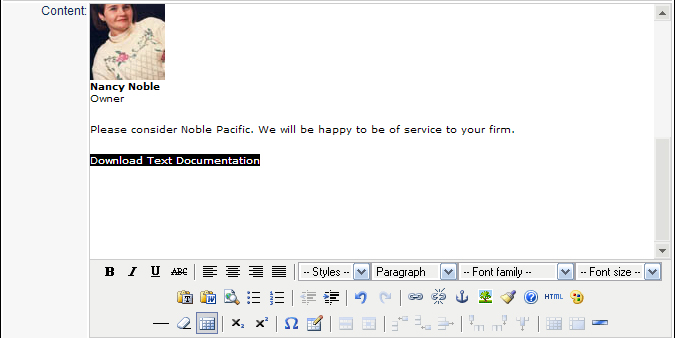
- You will then be redirected to the page's edit mode similar to the image below.
- Within the content box, type in the text in which you want your document to link to. (i.e. "Download Text Documentation"). Highlight the text that you just typed.
- Click on the link button just below the content box

- A pop up window will then come up similar to the image below.
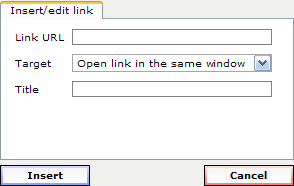
- Click on the "Link URL" box and press "Ctrl-V" to paste the url of the document.
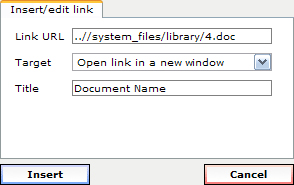
- Choose "Open link in a new window" so that the document opens up a new window and loads instead of using the one with your website on it.
- Type in a "Title" for the document.
- Press the "Insert" button. Press the "Accept" button when you are ready to post live.
- Click on the page that you would like to add the link.
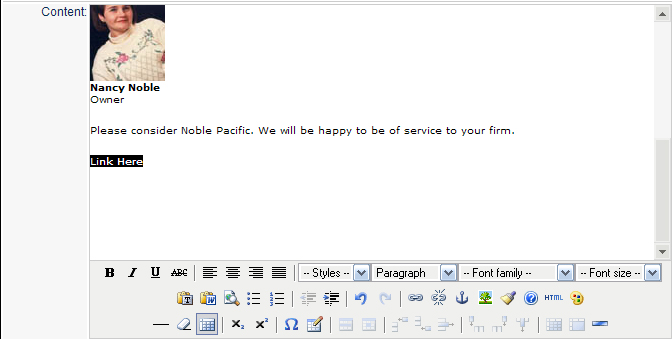
- You will then be redirected to the page's edit mode similar to the image below.
- Within the content box, type in the text in which you want your to link to be named. (i.e. "Link Here "). Highlight the text that you just typed.
- Click on the link button just below the content box
- A pop up window will then come up similar to the image below.
- Click on the "Link URL" box and type in the URL of the link you want to place.
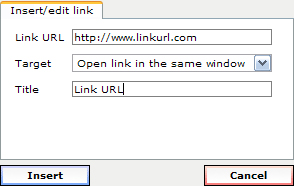
- Choose "Open link in a new window" if you are linking to a website that is not yours.
Choose "Open link in same window" if you are linking to a page on your website. - Type in a "Title" for the link.
- Press the "Insert" button. Press the "Accept" button when you are ready to post live.
- Page Title Tag - This is the text that shows up on your browsers top bar. It is also the name in which your page will be bookmarked and spidered for search engines.
- Description Tag - This is the tag in which search engines will spider your website. This is usually about a 1-2 quick sentence regarding the page of your website.
- Content Title - This is the header text on your website.
- Content - This is the area where all the content and graphics are editable
Old version is where you can go to recover and previously posted pages. This is a good backup tool you can use when making edits and modifications to your pages. This option is located on the right hand side of the "Pages" section of the CMS.
-
View our Case Studies
Explore the diversity of our work and how we made each one a success.
Let's get started -
RESOURCE CENTER
Resources to help you attract new and retain existing users.
Visit Our Resource Center -